Showing posts with label corsages. Show all posts

Tuesday, October 1, 2013

Garrick and Sarah's Wedding - DCWV

On Saturday I gained another sister, a sweet friend who I have considered a sister for a very long time already. I was happy to help with the wedding and reception in any way I could, and these are the projects I had a hand in. 


First, this is the card I made for the bridal shower.
1. Start with a white cardstock base (DCWV cardstock).
2. Add a strip of gold washi tape (or patterned paper if you prefer) 2/3 of the way up.
3. Collage flowers mostly below the tape.
4. Add DCWV bling centers to the flowers.
5. Punch small butterflies from DCWV glitter cardstock (Royal Garden stack) and adhere throughout the flowers.
6. Add an alpha sticker sentiment.


I was assigned to make the boutonnieres. Because burlap was a recurring element to the wedding decor, I turned to DCWV's burlap stack. I also used leftover bits from the wedding dress, and silk flowers and jute twine from other decor projects.
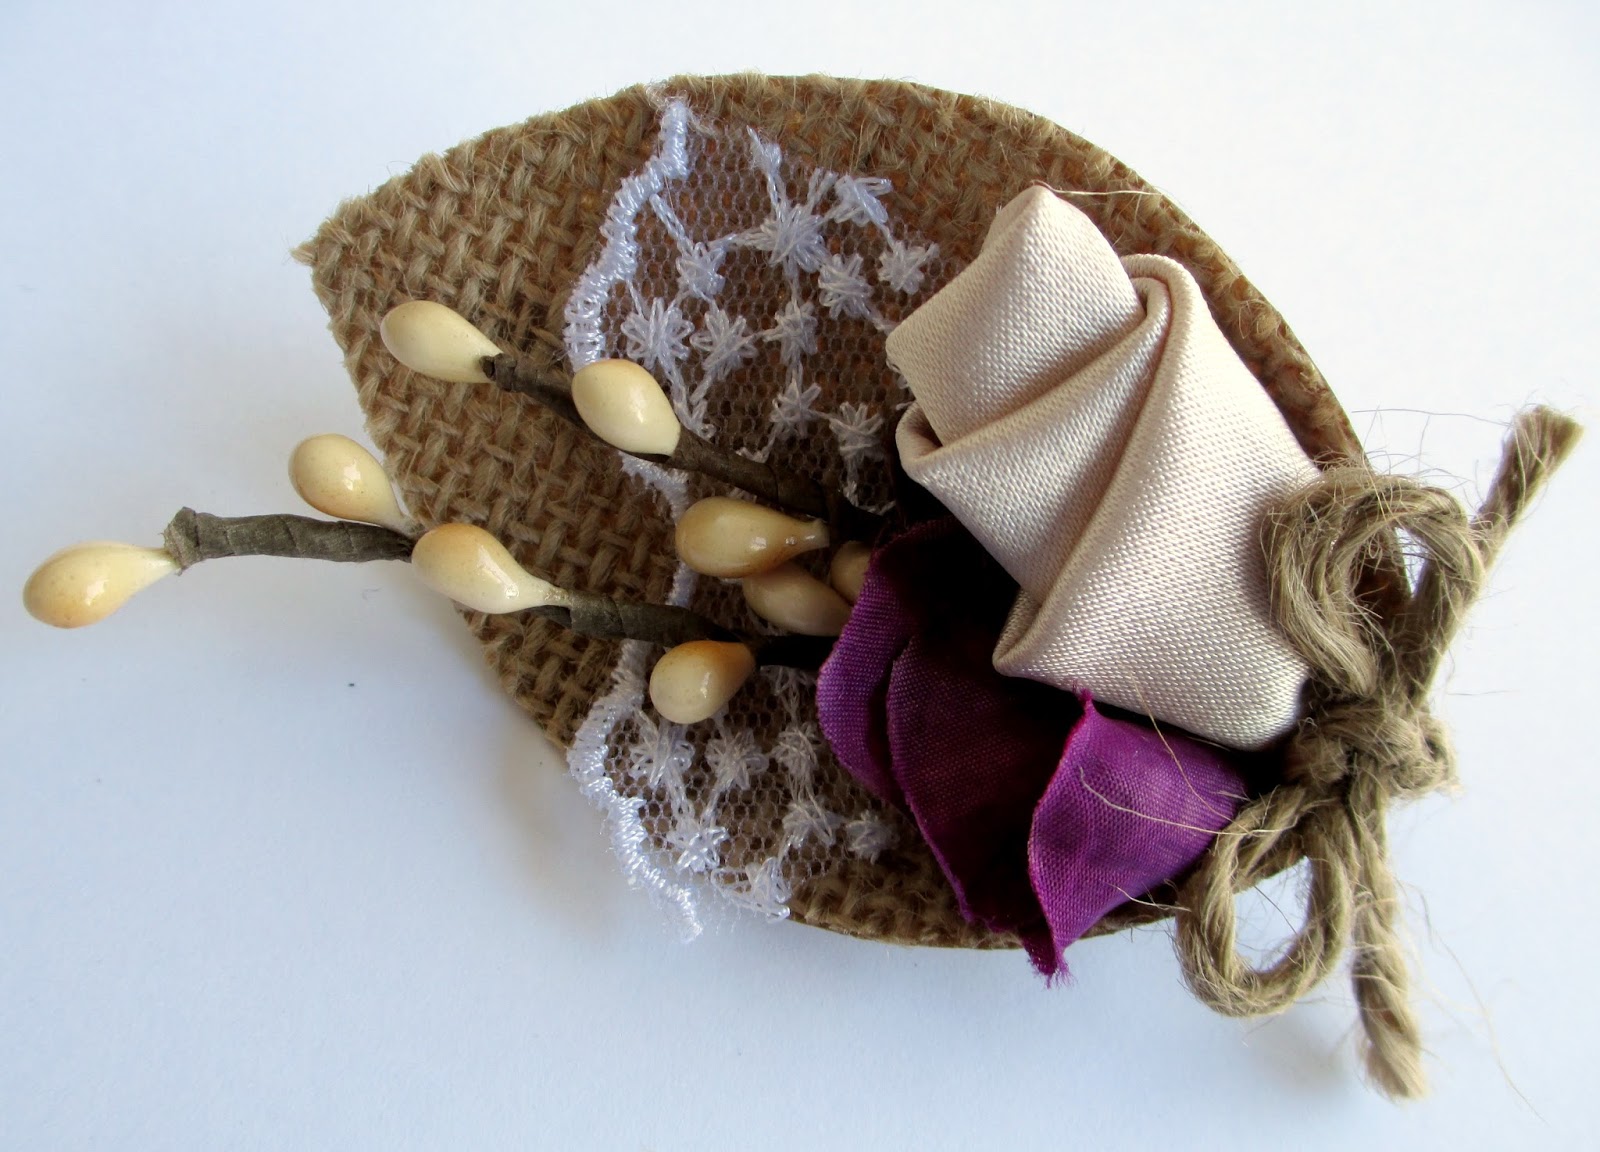


1. Hand-cut a large leaf from the burlap paper.
2. Glue in a bit of lace edging.
3. Glue in woodsy flower picks.
4. Roll satin to make a flower bud; glue in.
5. Tuck in a silk hydrangea flower.
6. Pinch bottom of leaf and secure in this curled shape with glue.
7. Add a jute twine bow.
8. Add a pin to the back.


I also made the corsages. I used these eggplant purple Satin Swirl Flowers from my etsy shop, Precocious Paper. I also added the same lace and woodsy flower picks that I used in the boutonnieres. I added tiny leaves hand-cut from DCWV's burlap stack, too.


The center pieces were simple. 


I cut burlap labels from DCWV's burlap stack using my die-cut machine and Spellbinders dies. They worked like a dream! My sister and new sister-in-law simply used a hot glue gun to attach them to the glass bottles, then tied ribbon and jute twine over the labels.


Embroidery hoops were another common element in the decor, so I learned a new stitch and embroidered e's for each table.


The burlap stack came in handy for the cake topper, as well. I used my Silhouette Cameo to cut a banner template, then we used the template to cut the pieces from the burlap paper. I didn't try, but I strongly suspect that this burlap paper is too robust to be cut by a Cameo ;).


1. Using a template, cut out banner shapes from burlap paper.
2. Punch holes in each of the top corners (we used a crop-o-dile).
3. Add alphas (cut by Silhouette Cameo).
4. String banner pieces with jute twine.
5. Attach banner to dowels.


We also used my Cameo and the burlap stack to make this "thank you" banner. The happy couple plans to use a photograph like this for their thank you cards. You can't see it very well here, but I also made the flowers on her wedding gown's sash :).


This is the wedding card I made. I opted for a romantic, layered, monochromatic look. 


1. Start with a white cardstock base (DCWV cardstock), size 4.25 x 5.5 inches.
2. Adhere a block of patterned paper (Everlasting Love Stack) to card, size 4 x 5.25 inches.
3. Layer a piece of burlap (Burlap Stack), some tissue paper, vellum and a shipping card in the center.
4. Add a bit of white washi tape to the edges of the layers.
5. Adhere flowers to tag.
6. Adhere DCWV pearl bling to the center of the flowers.
7. Add sticker sentiment to tag (SRM Stickers).


We had a lovely time, but my favorite part (besides seeing how happy Garrick and Sarah were) was definitely spending time with my sisters putting it all together. Thanks to DCWV for the help in making so many projects! Be sure to pick up that burlap stack, crafty friends - it's seriously amazing! Have a great day! Tessa

Wednesday, May 8, 2013

Mother's Day Corsage - Epiphany Crafts

Between filling orders for the shop, I've been collecting many, many new fabrics for the upcoming Summer update. One in particular just seemed to call to me when I sat down to make my latest Epiphany Crafts project:


I just love the deep coral-pink and the floral print! You can read through the post at Epiphany Crafts here for the how-to. All of the flowers you see here are currently or will be in the shop for the update, June 1st.


I love using my Epiphany Crafts tools to create the flower centers. I used the oval tool and the small round tool here. The settings are spray-painted gold, but the original silver finish they come in is very pretty, too.


As I mention on the Epiphany Crafts blog, making my mom and mother-in-law fabric flower corsages for Mother's Day has become a tradition. I love seeing them wear their flowers with their Sunday best, on Mother's Day and other days throughout the year. And I know my mom is always happy to tell anyone who asks that her daughter made it! You gotta love Mom :).


Have a great day! Tessa

PS - I'm entering this brooch in the Mother's Day Your Way contest, Best Craft/DIY category, found here. It's all about great Mother's Day gifts under $25.00. My brooch came in well under that mark. Wish me luck :).

Edited to add: My brooch received an honorable mention :). See here. Thank you, NerdWallet!

Monday, October 1, 2012

Wedding, Part 1 (and a winner!)

After pulling together my photos from my sister's wedding, I decided to write up two separate posts for sharing. Today's installment is what I made for wearing - corsages, boutonnieres, etc. Tomorrow's will be all about the wedding decor. Elizabeth's colors were orange, aqua and ivory with a touch of brown. The theme was vintage - handmade - outdoors. Inspired by Martha Stewart boutonnieres that I had seen online awhile back, I created these boutonnieres for the groomsmen and fathers:


Made of sticks from a tree on my parents' property, feathers, and beaded sprays from hydrangeahippo, everyone thought these were the coolest boutonnieres they had seen in a long time. One groomsman with an attitude thought they were weird, but hey - what does he know? Obviously nothing ;).


I simply attached two twigs together, added a feather, then added the sprays. I wrapped them all together at the bottom with a satin aqua and brown polka dot ribbon by American Crafts. I've had this ribbon for years and am so glad that I held onto it!


The leaves are made from pages of Elizabeth's favorite book (an another theme in the wedding decor), Pride and Prejudice. I glued them to the back of the boutonnieres and then added a gold jewelry safety-pin. A corsage pin would not have held these.


The groom's boutonniere was a bit different. Karl's had a larger feather, as well as a special touch to his leaves. See it? Sorry for the poor photo - I had to get him his boutonniere as soon as it was made and didn't have time to photograph it properly.


I managed to find a part of the book that read "Elizabeth accepted..." How perfect is that?! For the bridesmaids, I made these necklaces:


Not only did I make the flower (a ruffle blossom that you can find in my shop here), but I also made the beaded part - holy moly, making four of these was good practice! I am not a beader, but I think they came out pretty well. Just don't look too closely ;).

I made similar flowers for the mothers to wear as corsages:


And then petite little hair clips for the two little nieces (their dresses were aqua):


It was so much fun to make things I don't ordinarily make, especially for my sister. Tomorrow I'll share more Pride and Prejudice-inspired things and a handy way to hang muslin from the ceiling. See you then!

***

WINNER: For those of you who played along with my 500 Facebook likes giveaway, I am sorry for the delay in posting a winner. We had yet another wedding last weekend (other side of the family). The randomly selected winner of a $10.00 credit to the shop is...


Debbie, email me at precociouspaper (at) yahoo (dot) com and I will let you know how to redeem your prize.