Showing posts with label adlyn's nursery. Show all posts

Thursday, January 28, 2016

Accessories Star - We R Memory Keepers

I want to start today's post by saying thank you for your words of comfort. As I shared in a recent post, my grandfather passed away last week. The viewing and church services were yesterday and today is the graveside service. Celebrating his life yesterday was very special, and seeing family that I haven't seen in a very long time was really great. As we sat at the luncheon after the service, a video that the family put together for my grandparents' 50th wedding anniversary was playing. As I watched photos go by of myself from little girl to mother of my own kids, I couldn't help but feel impressed to take more photos. I encourage you to do the same.


Judging by today's project share, I can't help but add a photo to just about anything ;). I'm excited to share with you my first project for We R Memory Keepers using their fabulous new Ruler Studio collection.


If you're looking for a unique piece of home decor, that can also be really functional, this is it! The system is easy: start with a ruler. They come in different lengths and a few different colors. If you wanted to, you could combine rulers, too. They are hinged so that you can bend them into pretty much whatever shape you can imagine. I wanted lots of angles to hang things from, so I chose a star.


This piece is hanging over my little girl's changing table, so it's great for storing accessories that she loves. Not only are her favorites within reach, but they also act as cute decor. The knobs and clips that are part of the collection are so fun to mix and match.


And of course, I had to make some flowers to embellish the star with! I'd love it if you hopped over to the We R Memory Keepers blog today to check out my post and more about this project. And while you're there, be sure to check out all the other Ruler Studio projects from this week. There are so many possibilities!

Enjoy your day. Take some photos. Save them. And perhaps print them and create something with them. Someone, someday, will appreciate your efforts very much. Have a good one! Tessa

Friday, July 25, 2014

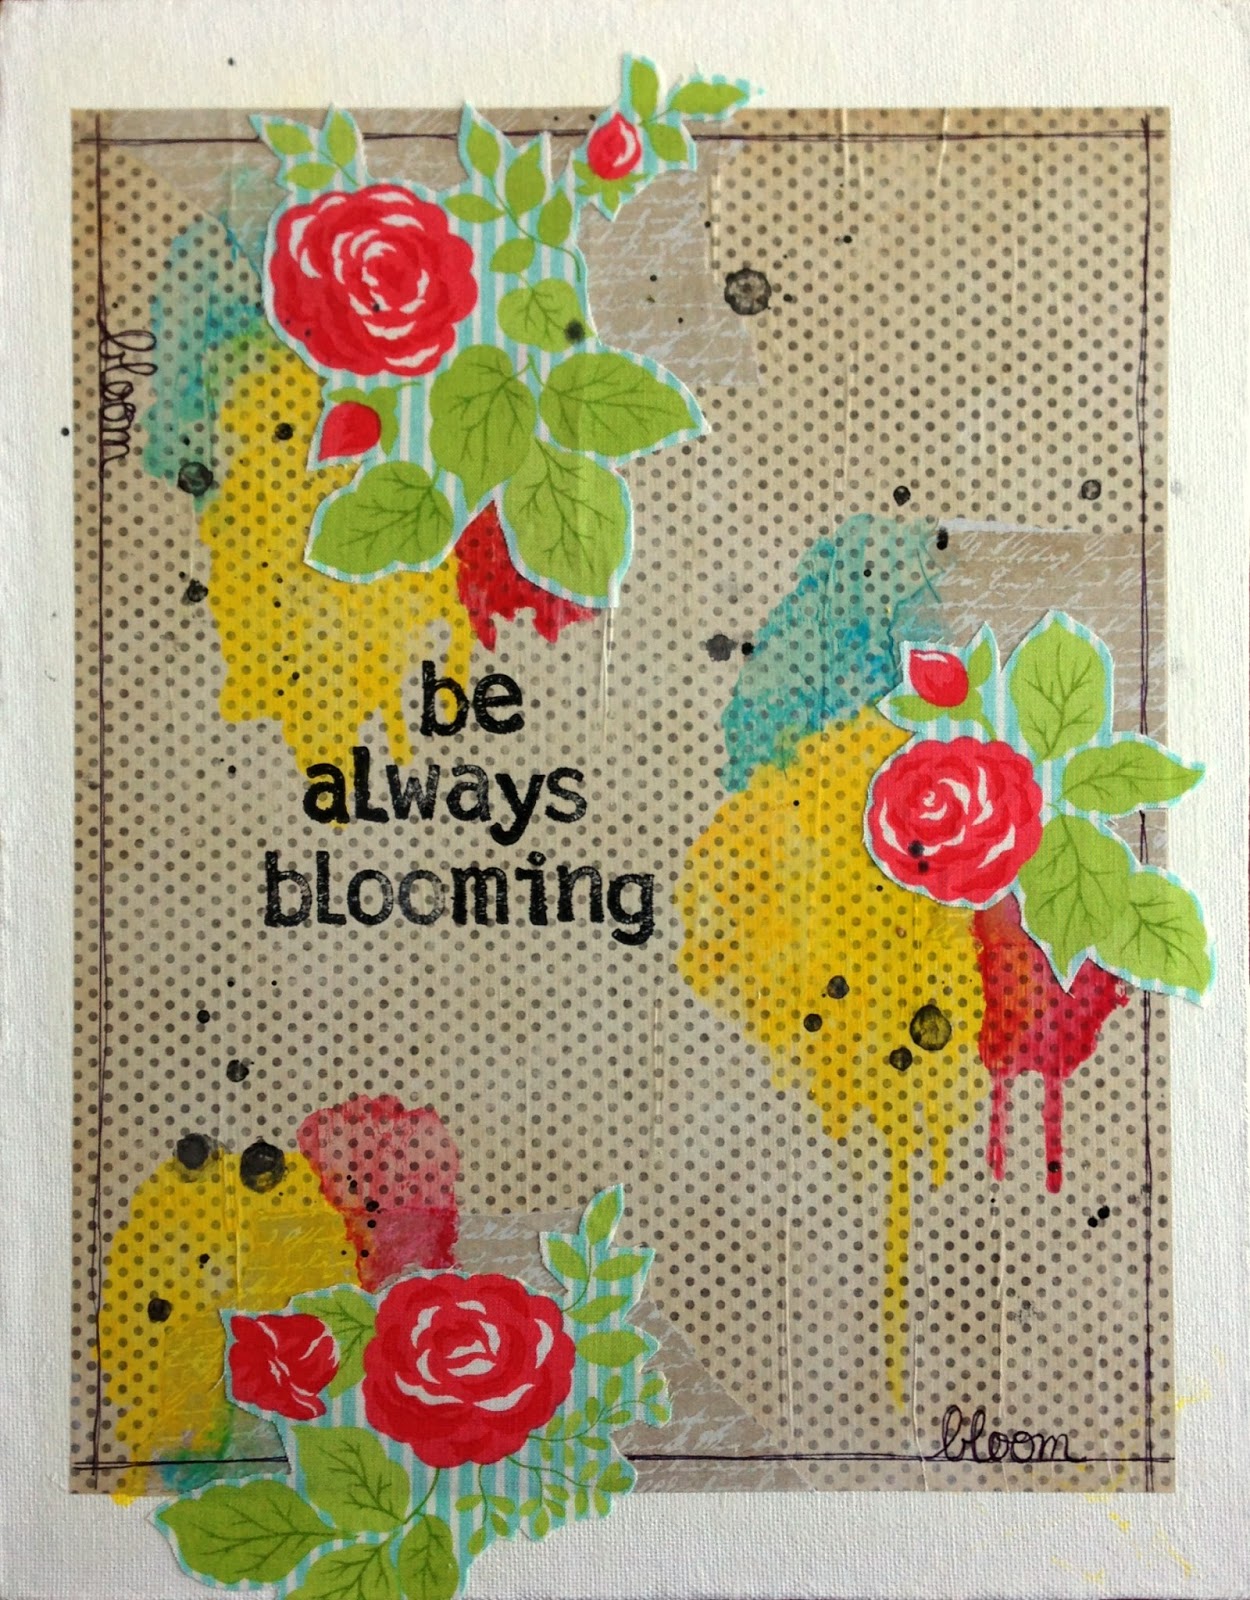
Be Always Blooming - DCWV

DCWV has a new stack coming out in the next couple of weeks that I'm really excited about called Vintage Essentials. The patterns are all vintage-inspired, such as ledgers, book text, and script. The weight of the paper is my favorite part - it's newsprint! The light weight is perfect for altered projects, and a decoupaged canvas was what I tried first:


You can read about my process at the DCWV blog today, but I basically decoupaged a couple of Vintage Essentials papers to the canvas, used gelatos to add color, and decoupaged some fabric pieces, too.


The fabric is leftover from the embroidery hoops I made for Adlyn's nursery. This canvas will hang in the nursery, too, but probably closer to my wall of artsy/crafty supplies.


Addie's fairly mobile these days, so that Expedit shelf wall is a top priority. I've got the lower shelves figured out, so she can't do any damage to those supplies, but the higher shelves are testing my creativity. I'm loving collecting storage containers in my aqua/yellow/red palette, though!


You can read more about the canvas at the DCWV blog here, and you can find the Vintage Essentials stack at Michaels in the coming weeks. Thanks for stopping by today! Tessa

Thursday, July 17, 2014

Live Your Life Happy - DCWV

Hello! Today I am guest blogging at DCWV again :). I'm sharing some new wall art for Addie's nursery:

This is an 8x10 canvas panel that I colored with gelatos, then embellished with stamps and die-cuts from DCWV's Vintage Collector line. Vintage Collector was widely available at Michaels stores this past year, although mine sold out pretty quickly.


For more detailed instructions to make your own, please see my post at the DCWV blog today.


I've only played with gelatos a few times, and this was my first canvas. I absolutely LOVED how this came together. I watched a few tutorials online, overcame my hesitation and indecision, and just started laying color down. Now I need more canvas panels!


Thanks for stopping by today. Have a good one! Tessa

Tuesday, June 24, 2014

Nursery Wall Art - Love My Tapes

Hello! Today I am sharing some new wall art for Adlyn's nursery on the Love My Tapes blog. It took me about five minutes to make and I absolutely love it!


First, start with a wooden letter. This one came pre-painted, but I distressed it a little bit. You could paint a plain letter to match your lace tape, or you could spray paint the entire piece after applying lace tape in whatever color you'd like.


Second, apply the tape to the letter with the trim pointing right. Third, apply another strip of tape with the trim pointing left, butting up the edges so that it looks like one piece of lace trim.


Last, use scissors to trim off the extra lace. Done! Easy-peasy and super cute. You can check out my post at Love My Tapes here. Thanks for stopping by today! Tessa

Friday, April 11, 2014

Adlyn's Nursery Wreath - Front Door Friday


Welcome to installment #2 of Front Door Friday! Someone asked me, "Are you really going to share a new wreath every week?" My answer is yes, that's the plan for now! Last week's post was about the Spring wreath currently on my front door. Today's post is about the wreath I made for Adlyn's nursery's door:


I love how feminine lace instantly makes any project. The teal color is fun and bold and the scalloped edge is a beautiful pattern to repeat around the wreath.


Because the wreath is an indoor wreath, I was able to raid my stash of paper flowers as embellishments. All of these flowers are by Prima. I don't recommend using paper flowers on wreaths that will be outdoors. The sun will fade them quickly and moisture will damage them. Plus, bugs like to make them homes and it's hard to clean them out.


I only had one of these doilies but I wanted a bit to peek out at the top and bottom of the cluster of flowers. So, I cut it in half. This tip works great for paper doilies on scrapbook pages, too. ;) I thought about hanging this wreath by more of the lace, but this key print twill ribbon was perfect for a door. Key...door...get it?


I'm not sure I'll make an inspiration board every week, but last week's was popular so I gave it a go this time around, too:

Thanks for visiting! Next week I'll be sharing another Spring wreath, this time full of pastels perfect for Easter. Have a great day!

Tuesday, April 1, 2014

Altered Art for Adlyn's Nursery - Mini Canvas

One of my favorite pieces of advice for decorating a home is to go for a "collected" look. Don't buy all of your furniture and decor all at once or from the same store. Allow some time to gather things, add and subtract as you go, and mix things up. I have to admit, I almost disregarded that notion when I was scrambling to finish Adlyn's nursery before she was born. But, I ran out of time, and luckily that means I have had more time to collect. I've also had more time to create some handmade things, which is a main theme in her nursery. This little altered canvas is one of those things:


First, I Mod Podged several layers of sewing pattern paper to a 4x4 canvas. I let the sewing pattern paper wrap the edges, too.


Once dry, I applied Whipped Spackle (by Faber-Castell) with my putty knife.


Next, I used white opaque ink, a foam sponge and the punchinella template by Crafter's Workshop to add dots. Polka dots are a theme you'll find in Addie's nursery, too.


I used a black pen to trace circles and draw the border. Lastly, I adhered the buttons (Prima) and a bit of wound-up thread to the canvas.


Besides the drying time, this project was short and sweet. I love the end product and can't wait to hang it up in her nursery. I think I might make another one or two to go with it. These kind of altered art projects are addicting!

Thanks for stopping by :). Enjoy your day! Tessa

Wednesday, January 8, 2014

Hearts and Triangles - Fancy Pants Designs Sneak Peek

I'm up on the Fancy Pants Designs blog today :). My assignment - the trendy heart. I decided to take it a bit further and combine hearts and trendy triangles. Here's a little peek:


Find the rest of the layout at the blog here. And if you're looking for Valentines ideas, check out the card I made with a similar technique :).

Enjoy your day! Tessa

PS - Because this is now a daily question from so many friends and family...no baby yet. Three weeks until she's due. Follow me on instagram to see how her nursery is coming along :).

Wednesday, January 1, 2014

New Year, New Word, New Room


Hello twenty fourteen! I am really looking forward to what this year will bring. I can finally say I'm having a baby this year! In fact, this month! Adding a little girl to our family is sure to bring quite a few firsts for the Buys'. Besides Adlyn joining us, there are some other changes on the horizon - the nature of Josh's job is changing; Colten will start middle school; Jaxon will start Kindergarten. So many good and exciting adventures!

While I'm looking forward, I'm also remembering the difficulties of 2013. From the miscarriage at the beginning of the year, to this difficult pregnancy, 2013 taught me much about trial, challenges, and enduring to the end. In October of 2013, our church held General Conference during which President Monson gave this talk: "I Will Not Fail Thee, nor Foresake Thee". As I listened, I was deeply touched. As he spoke about the loss of his precious wife, I couldn't help but relate to the loss I had suffered. I felt as though he were talking to me specifically, and I took his words to heart. It's from his talk that I found my One Little Word for 2014 - finish.


One of the ways I will act on this word is to finish more projects. This past year has left me with many, many unfinished projects that were interrupted by my health or other distractions. I plan to make 2014 a year that ends with an empty "unfinished projects shelf" in my craft space. One of the first projects to finish - and finish soon! - is Adlyn's nursery:


Inspired by this Pinterest pin (original source here). I am so thrilled with the way this turned out!


A work in progress - the two short walls flanking the window will display various embroidery hoop projects. Most of them are filled with fabric, but several will be altered. I'll share again when they are all complete.


A Christmas present from my parents. I'm still trying to figure out what I'll clip to the dress frame, but in the meantime, it's holding garland that I'm making for the ceiling and my cute new tote bag from Scrapbook Circle.

Happy New Year! I hope 2014 is everything you wish for :). Thanks for stopping by! Tessa