Friday, October 11, 2013

Halloween Framed Tags - DCWV Spooky Time Stack

This year for Halloween, my theme is Edgar Allen Poe's The Raven. I have decorated with ravens, feathers, and quotes from the poem alongside my pumpkins. I spiced up my living room gallery wall with photos from our recent pumpkin patch trip and decided to make this framed set of tags to go accompany my pictures and go along with my theme:


I used the Spooky Time stack by DCWV, as well as black cardstock by DCWV. Each tag is inked and/or stamped, as well as flicked with black mist. This particular tag also features the Gauze stack. Perfect for Halloween, I hand-cut leaves from the gauze-covered paper for my flowers. I used my Silhouette Cameo to cut the "nevermore". DCWV cardstock works great with this machine!


Three of the tags feature this cluster of a black feather, wood veneer feather, and small paper rose. The trio of black pearls is also by DCWV.


This orange flower is by Prima. The black flower is by Jolee's.


I used my Silhouette Cameo to cut the raven shape, then adhered it with foam tabs. The eye is a DCWV black pearl.


If you're looking to decorate with a little Poe yourself, here is a graphic I made to slip inside one of my 4x6 frames in my gallery wall. Enjoy!


Thanks for stopping by! Tessa

Thursday, October 10, 2013

Autumn Printer's Tray - DCWV

I haven't made a printer's tray like this in a few years (see my first here), and I thought my favorite season would be a fantastic theme for another. So, I gathered together my favorite DCWV papers and raided my stash for coordinating embellishments. In one evening, I was able to fill every nook and cranny with orange, mustard, gold and aqua - my favorite color palette for fall!


Here are the papers I chose to work with, labeled with their respective stack:


Before gluing anything in, I measured each cubby and then decided which patterned papers to place in each one. Next, I figured out which embellishments to use and where to put them. When I was happy with the look, then I started adhering things to the tray. Some of my favorites include this flair, by A Flair for Buttons:


Of course, I love the large orange flower by Prima. The metal leaves are from Freckled Fawn.


Another favorite detail is this mini spool of thread. I picked up a bag of these spools at my local JoAnn store. I wound the thread around and paired it with a paper flower. Because of the pretty gold foil and glitter details on several of the papers, I wanted to embellish with gold things, too. I spray painted a couple of resin flowers gold and paired them with more Prima flowers and felt roses from my Etsy shop, Precocious Paper.


I used DCWV's burlap stack to add leaves to some of the flowers, as well as a backing for some of the compartments.


I filled these Tim Holtz vials with glitter for some more sparkle.


I just added my tray to a photo frame collage wall in my living room. Once I've got it all decorated for fall, I'll share a photo. Thanks for stopping by! Tessa

Wednesday, October 9, 2013

Please help us find Brisa


This is Brisa, my five-year-old niece. She is the daughter of one of my husband's younger brothers, Jacob. I've only had the chance to see her a handful of times, but she is a sweetheart and adores playing with her cousins (my boys). Brisa's mom and dad divorced, and unfortunately, the situation has been difficult, messy, and so very sad. Ultimately, after a thorough and lengthy court process, Jacob was given full custody this past July. Her mother was supposed to return Brisa to California from Maine in August. Instead, both Brisa and her mother have disappeared. A warrant is out for Brisa's mother's arrest. The FBI is investigating, but at this time, they have no leads to Brisa's whereabouts.


Last night, our local news here in Sacramento, California ran Jacob's story. You can see the report here.

Please watch, share on social media, and keep your eyes open. I know many of my readers, facebook friends, and dear customers are scattered across the country. Maybe you, or someone you know, has seen Brisa and can notify authorities so that she can get home safe and sound. I know these kinds of custody battle situations make many people squeamish, uncomfortable. Yes, there are two sides to this story, but the courts have heard both sides, and they place their faith in Jacob. Please, we just want to see Brisa with her daddy, getting the help she needs, starting school, and blossoming in a healthy, stable, loving home. Thank you. Tessa

Tuesday, October 8, 2013

Bishop's Pumpkin Farm - DCWV

Last night we went to Bishop's Pumpkin Farm. It's a tradition that we go the first Monday night in October. The farm is a local, family-owned place where there is a huge pumpkin patch (complete with hay ride to get to the patch), a giant pumpkin patch (where we tend to take our photos), a train, animals, a corn maze, a sunflower labyrinth, mining for marbles, slides, a playground, vintage farm equipment, shopping, food...so much good stuff! Here are a few shots from last night:


Last week, I scrapped a photo from last year's outing:


This layout is based on this sketch, the October sketch challenge at DCWV:


I used a combination of the Homeroom and Pumpkin Patch Stacks. I wanted to throw in some blue and gray, so that's where Homeroom came in. Love the pretty oranges from Pumpkin Patch, though! I also used a pretty gray, textured paper from the Pebbled stack.


The washi tape is from an old Studio Calico kit. The boy and girl silhouette flair is from A Flair for Buttons. I just cannot get enough of her flair!


The corrugated people are from an old Scrapbook Circle kit. The gold leaves are by Martha Stewart. I really raided my stash for the perfect embellishments ;).


If you'd like to play along with the sketch challenge, or the color theme card challenge, you can find the details here. Tomorrow, I'll be sharing more DCWV fall goodness with a printer's tray that I put together recently. Thanks for stopping by! Tessa

Tuesday, October 1, 2013

Garrick and Sarah's Wedding - DCWV

On Saturday I gained another sister, a sweet friend who I have considered a sister for a very long time already. I was happy to help with the wedding and reception in any way I could, and these are the projects I had a hand in. 


First, this is the card I made for the bridal shower.
1. Start with a white cardstock base (DCWV cardstock).
2. Add a strip of gold washi tape (or patterned paper if you prefer) 2/3 of the way up.
3. Collage flowers mostly below the tape.
4. Add DCWV bling centers to the flowers.
5. Punch small butterflies from DCWV glitter cardstock (Royal Garden stack) and adhere throughout the flowers.
6. Add an alpha sticker sentiment.


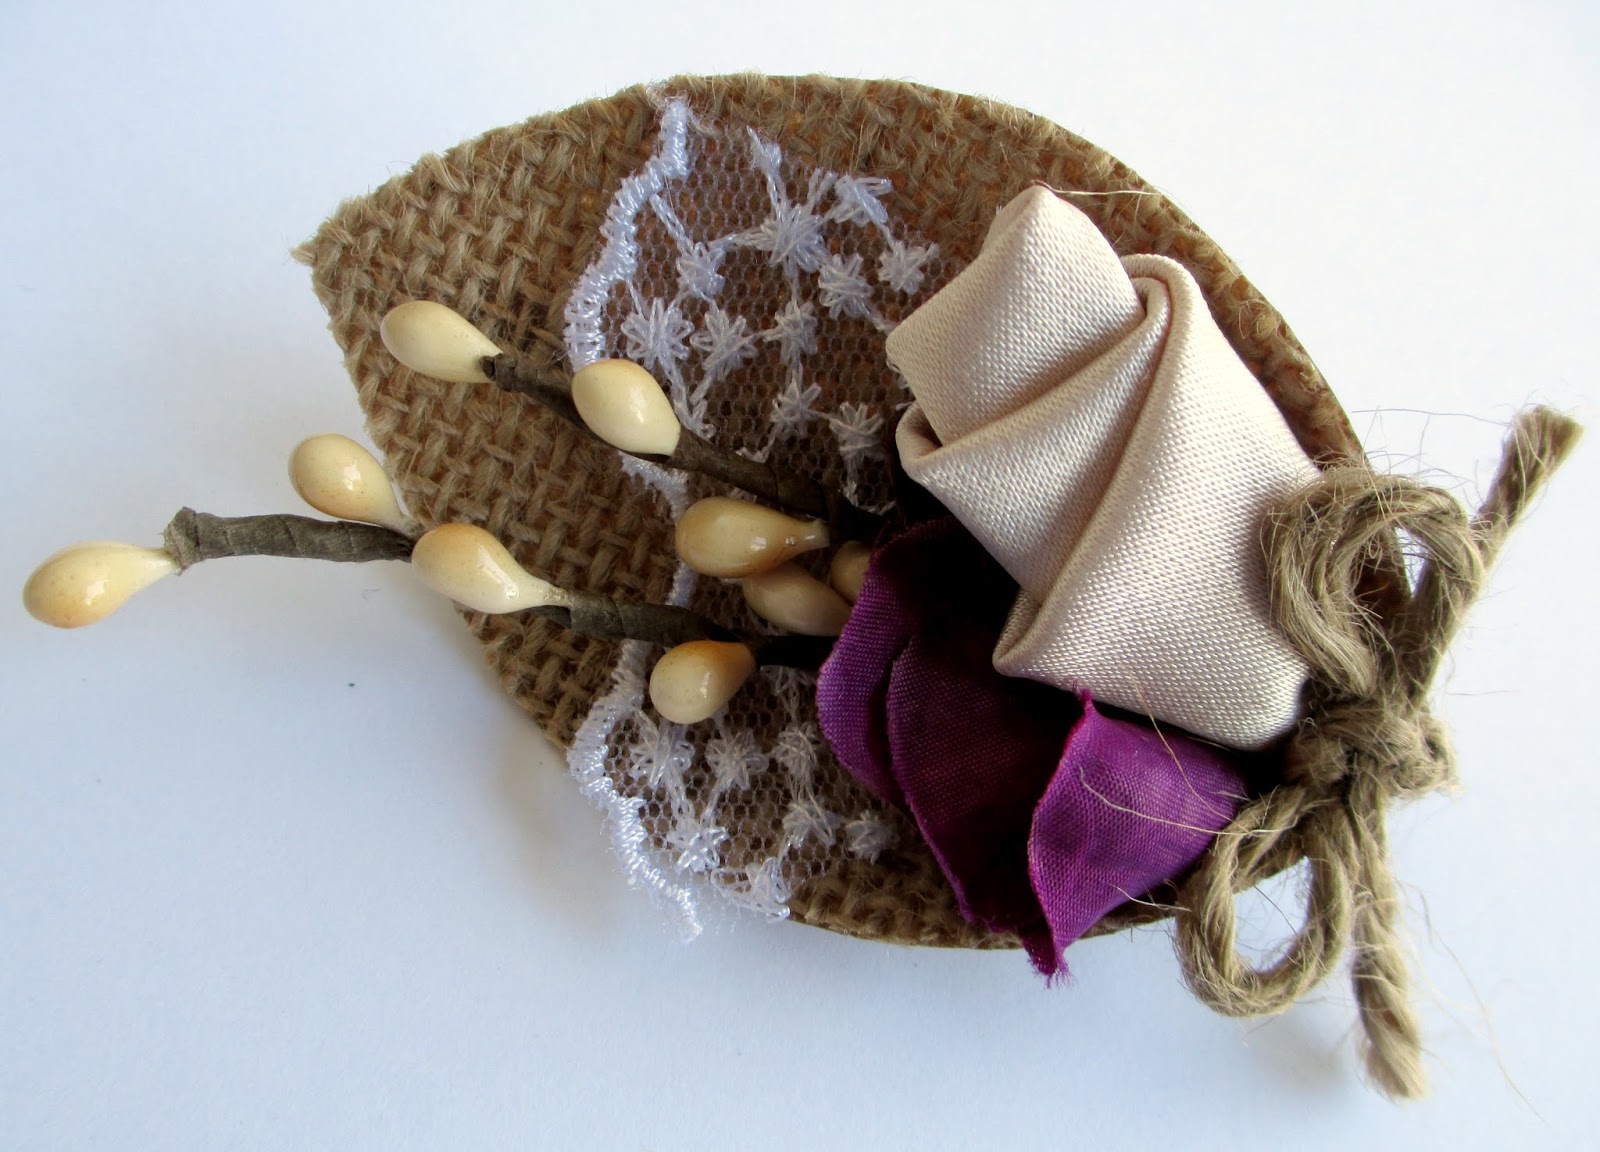
I was assigned to make the boutonnieres. Because burlap was a recurring element to the wedding decor, I turned to DCWV's burlap stack. I also used leftover bits from the wedding dress, and silk flowers and jute twine from other decor projects.


1. Hand-cut a large leaf from the burlap paper.
2. Glue in a bit of lace edging.
3. Glue in woodsy flower picks.
4. Roll satin to make a flower bud; glue in.
5. Tuck in a silk hydrangea flower.
6. Pinch bottom of leaf and secure in this curled shape with glue.
7. Add a jute twine bow.
8. Add a pin to the back.


I also made the corsages. I used these eggplant purple Satin Swirl Flowers from my etsy shop, Precocious Paper. I also added the same lace and woodsy flower picks that I used in the boutonnieres. I added tiny leaves hand-cut from DCWV's burlap stack, too.


The center pieces were simple. 


I cut burlap labels from DCWV's burlap stack using my die-cut machine and Spellbinders dies. They worked like a dream! My sister and new sister-in-law simply used a hot glue gun to attach them to the glass bottles, then tied ribbon and jute twine over the labels.


Embroidery hoops were another common element in the decor, so I learned a new stitch and embroidered e's for each table.


The burlap stack came in handy for the cake topper, as well. I used my Silhouette Cameo to cut a banner template, then we used the template to cut the pieces from the burlap paper. I didn't try, but I strongly suspect that this burlap paper is too robust to be cut by a Cameo ;).


1. Using a template, cut out banner shapes from burlap paper.
2. Punch holes in each of the top corners (we used a crop-o-dile).
3. Add alphas (cut by Silhouette Cameo).
4. String banner pieces with jute twine.
5. Attach banner to dowels.


We also used my Cameo and the burlap stack to make this "thank you" banner. The happy couple plans to use a photograph like this for their thank you cards. You can't see it very well here, but I also made the flowers on her wedding gown's sash :).


This is the wedding card I made. I opted for a romantic, layered, monochromatic look. 


1. Start with a white cardstock base (DCWV cardstock), size 4.25 x 5.5 inches.
2. Adhere a block of patterned paper (Everlasting Love Stack) to card, size 4 x 5.25 inches.
3. Layer a piece of burlap (Burlap Stack), some tissue paper, vellum and a shipping card in the center.
4. Add a bit of white washi tape to the edges of the layers.
5. Adhere flowers to tag.
6. Adhere DCWV pearl bling to the center of the flowers.
7. Add sticker sentiment to tag (SRM Stickers).


We had a lovely time, but my favorite part (besides seeing how happy Garrick and Sarah were) was definitely spending time with my sisters putting it all together. Thanks to DCWV for the help in making so many projects! Be sure to pick up that burlap stack, crafty friends - it's seriously amazing! Have a great day! Tessa