Saturday, March 28, 2015

DCWV and Tombow Blog Hop

Hello and welcome to Precocious Paper! If you just arrived from Latrice Murphy's blog, you are in the right place. If you just happened to stop by, we'd love to have you join in the fun by starting the Gold and Cork blog hop with DCWV here.


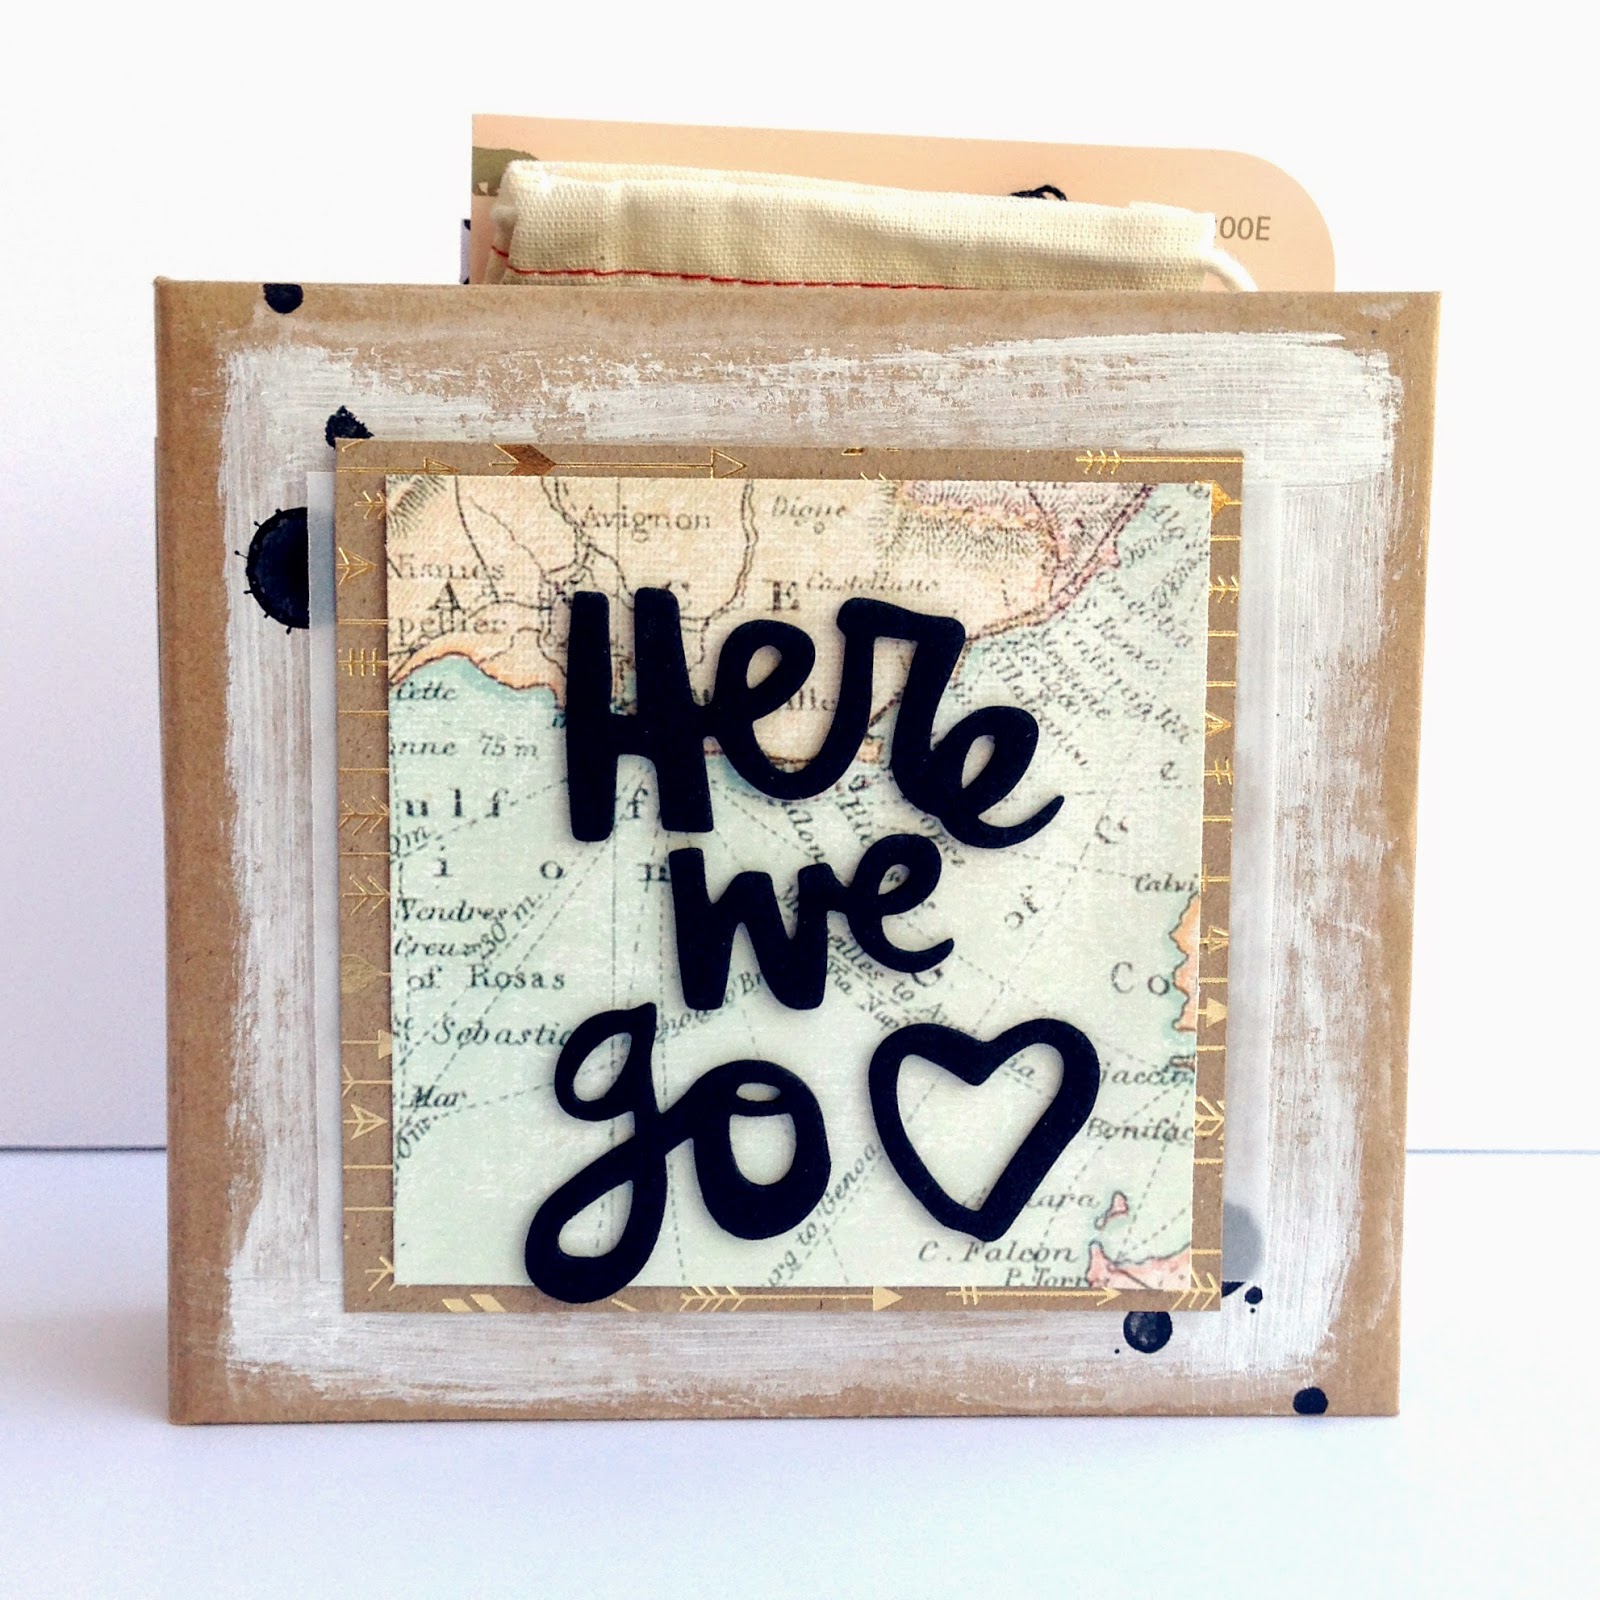
We are going on a little family day trip soon and I wanted to create a place for all of my photos, receipts, postcards, etc. from our adventure. DCWV's kraft Insta Photo Fun Album was the perfect base. Using the Gilded and Cork stacks, as well as Insta photo pockets and bags, tags and envelopes from my stash, I put together this travel album:


It isn't complete because our memories are yet to be made, but I did put together a little kit for finishing it up. I made a set of "stickers" out of the DCWV papers. To make them self-adhesive, I used Tombow's pastel adhesive dots. I love that they are mounted on the backing individually - perfect for this use!


I used Tombow's Extreme Adhesive to adhere the patterned papers to the front of my album. I also used the Extreme Adhesive to glue patterned papers together, creating more pages for my book. I think that stuff may be my new favorite tape runner! Tombow's Foam Tape is in my stash, ready to adhere my photos. I want each snapshot from our special day to lift off the page :).


Besides DCWV's Gilded Stack, I also used a map patterned paper from one of the specialty packs available at JoAnn stores. The polka dots come from a DCWV greeting card. The number tags are from Ikea - I love their new party and stationery stuff!


I'll be sure to share the album when it is all finished. Give me a couple of weeks, though ;).


Thank you for stopping by today! Be sure to comment on all the blogs along the hop to be eligible to win the Tombow and DCWV prizes (entries accepted through March 31st, winner announced April 1st). If you haven't had a chance to play with these products yet, you are missing out! Enjoy the rest of the hop, as well as your weekend!

Tessa

PS - Head on over to Yolie Burke's blog next!

Monday, March 16, 2015

Paper Flower Brooch + Video Tutorial - DCWV

Hello! Have you seen the new DCWV project stacks at JoAnn stores yet? They are selling fast at my local Jo's and I am having a lot of fun with them. My latest creation is this pretty paper brooch, made with the Flowers project stack:


I added a brooch pin to the back so that it could be enjoyed on a cardigan or lapel. I'm thinking I need to make more as gifts.


If you'd like to see how the project stack works, and how you can make a ranunculus flower brooch of your own, check out my video tutorial:


Thanks for watching and stopping by today! Enjoy your week :). Tessa

Sunday, March 15, 2015

Let's Do Something New - The Studio Challenges

Hello! Happy Sunday. I hope your weekend has been a good one. Today I am sharing a layout that I created for the latest challenge at The Studio:


I have been taking Studio Calico's Color Theory class, taught by Wilna Furstenberg, and this page was inspired by the second lesson. I followed the basic design of Wilna's page as I worked with complimentary colors (purple and yellow). I used a Glitz design woodgrain roller stamp to try the lesson's technique of stamping in wet paint. I love the result!


The challenge at The Studio is to use older product from your stash. I started this layout with just paint, so I didn't have any particular papers in mind. When I went hunting for purple and yellow, it was hard to find purple, not to mention the right purple. Purple is just not a color we really use as scrapbookers, is it? I did, however, find my package of the Soleil collection by Basic Grey. It came out summer of 2012. I fell in love with it all over again while I was putting this page together!


I added paper to the top and bottom of the page, and cut apart a garland to add the arrows on the page. The alphas are also Soleil.


The layout is about the new pixie style I am working on. I cut it asymmetrically, and I am still growing out the long side a bit more. :)

To play along at The Studio, join us here. Thanks for visiting and have a great day! Tessa

Friday, March 13, 2015

Lucky Us - Pink Paislee

I am super excited to be sharing my first project as a design team member for Pink Paislee today!


This framed chicken wire piece is the newest addition to my St. Patrick's Day decor. I took the kids to the park a couple of weeks ago and gave them green, hairy mustaches and rainbow lollipops to pose with. Of course, the boys gave me the goofiest looks and Addie loved her first sucker!


Green has always been a favorite color of mine, so it was fun to pull all the green things I liked best from both the Citrus Bliss collection and the Atlas collection.


My favorite detail of the whole project is the rainbow (which does not have a pot of gold at the end). See the post on the Pink Paislee blog to read how I altered that fun chipboard element to create something perfect for the holiday.

Thanks for stopping by today! Have a good one :). Tessa

Tuesday, March 10, 2015

Butterfly Magnets - Pretty Little Studio

Hello! Just popping in to share a cute set of magnets that I created. I used the beautiful Marigold collection by Pretty Little Studio.


I used the Epiphany Crafts large round tool to punch the patterned paper circles and add the epoxy sticker tops.


I'll be setting this beautiful collection aside to work with new Pretty Little Studio lines. Be sure to check out You and Me, as well as The Gold Mine. The Gold Mine is filled with metallic foiled tags, papers, vellum, and more. It is oh-so-pretty! Also, join the Pretty Little Studio facebook group to see sneak peeks of the next line, Treasure Island. It is gorgeous!


Thanks for stopping by today! Have a good one :). Tessa

Monday, March 2, 2015

Lucky Us Vase - SRM

I am so excited to share a new product being carried by SRM Stickers with you today! The chalkboard trend is not going away any time soon, and SRM is bringing you something that will make creating chalkboard surfaces so much easier than the typical bottle of paint and a brush.


This isn't a chalk marker. It's a chalkBOARD marker. Think of it like a paint pen, but instead of regular paint, it applies chalkboard paint. Once you have followed the directions, the surface can be used like a chalkboard, especially with the Bistro chalk markers that SRM is also now carrying.


I experimented with the marker on a glass vase. The marker is not recommended for glass because it isn't permanent on glass, but you can still have a lot of fun creating with it so long as you don't mind the chalkboard being fairly temporary. I have a list of tips for working on glass on the SRM Stickers blog today.


Next I am going to try turning a framed piece of glass into a chalkboard, or maybe a mirror. So many possibilities! And, of course, I'll be trying it out on a layout soon, too.

For more details about this amazing marker, head on over to the SRM blog. Thanks for visiting today! Have a good one! Tessa

Sunday, March 1, 2015

I Am - The Studio Challenges, Scrapbook Circle


I'm excited for March! The calendar is full - fun stuff, challenging stuff, projects, events, birthdays, etc. Although we would rather have the rain, the spring-like weather we are enjoying is beautiful! Blossoms in the trees, poppies growing everywhere...I love it!


I also love the new challenge up today at The Studio. The design team suggested items to include on a layout, and the challenge is to include as many of those things as possible. I managed to include every single one:


I wouldn't normally reach for all of these things for the same layout, so this was definitely a challenge. To get it done, I used two strategies: use small amounts of everything, and use the same color for most of it.


One chipboard heart, three tiny brads, two sequins, a bit of thread - all in gold. The mist was easy as I almost always include a little bit of mist anyway (that was my contribution to the challenge), and the vellum was also a simple addition. The stamping was intimidating at first, but after turning to this row of triangles stamp by Scrapbook Circle, I thought the stamping was a great finishing touch.


Speaking of Scrapbook Circle, almost all of my materials for this page came from the March kits. The thread, sequins, brads and mist are from my stash, the stamp and chipboard heart are from past kits, but the papers, stickers and die-cuts are all from Here's the Story and the add-ons. Lots of "I Am" by Simple Stories, "On Trend" by My Mind's Eye here. The kit also includes quite a bit of the new papers and embellishments by Pinkfresh Studios (one of my favorite booths at CHA this year!). Be sure to check out the kits here.

You can find the challenge details at The Studio here. Thanks for visiting today! I hope your March is fantastic :). Tessa